Wednesday, 25 March 2015

Doll accessories


So I have a friend who used my embroidery machine to embroider lots of things that will be made into doll clothes.

Yeah, she's a bit obsessed with dressing up the dolls and taking pictures of them. 

One outfit is an Elf Princess dress so another friend and I worked together to make the doll a circlet


After making the monster stuffy, I realized that it would be pretty easy to make a teddy bear for her dolls too.  I digitized an In the hoop design. 


Not stopping there, it was time to make a little in the hoop doll for the dolls as well


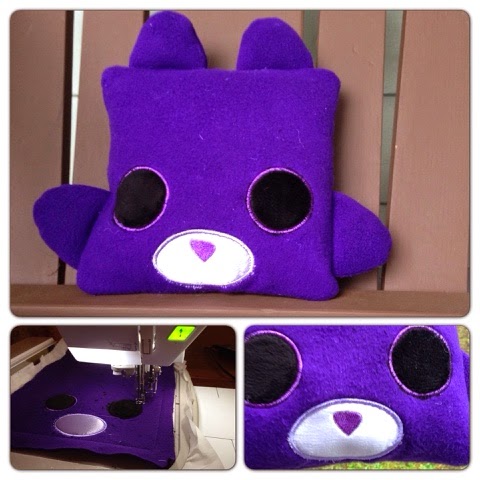
Monster stuffy

Saw a similar pillow design in a book so decided to make one in the hoop.   Unfortunately the fleece was too thick to do the final sewing in the hoop but it wasn't too hard to finish with the sewing machine.

Ears and hands were done in one hooping 


The next stuffy/pillow is a Toothless from "How to train your dragon".  The ears and wings are felt.  We didn't have any black felt so covered dark blue felt with black broadcloth. The body needed the 8 x 12 hoop but I did all the wings and ears in one hooping of the 8 x 8.  It was late so forgot to take pictures while in the machine.   The eyes are a mix of appliqué and embroidery.  

Because the wings and ears were thinner I was able to sew the thing together in the hoop. 

Toothless is made out of minky so is very soft.  


After that it was time for a black cat.  

I wanted to keep the ears thin so used felt for the ears

Still no black felt so coveted front and back of the felt with black broadcloth and used a zigzag stitch for the edging. Black embroidery thread in the bobbin.   Ears hooped in 5x7 hoop.    

Eyes are appliqué.  Body done in 8x8 hoop. Stitched  together in the hoop


Lastly a penguin. Running out of black minky so only had enough for the wings and the front.  The back is a coordinating fabric and the white part is eyelet over white felt.  Wings are minky with tear away left in to give it some stiffness.  Wings hooped in 4x4 and the body in 8x8


Here's the group shot


Sunday, 22 March 2015

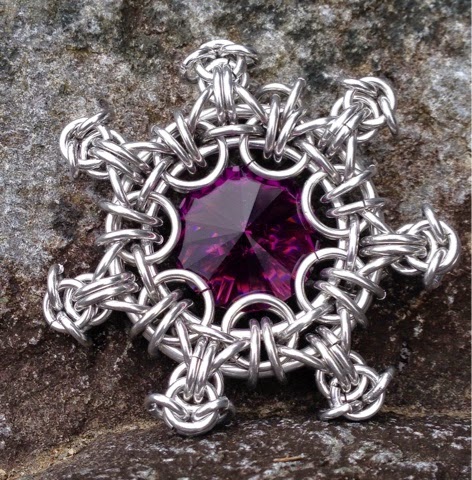
Chainmaille pendants


I've spent the last day making chainmaille pendants since someone is using my embroidery machine.  

First up is called Victorian snowflake with a crystal centre


The next one I made is called Celtic Chrysanthemum.  


The next one I made is Sunburst.  I took the opportunity to add some colour. 


The last one is called Grandma's Rose.  I can add colour in the centre or around the edge.  I might try smaller earrings in this one next


Wednesday, 18 March 2015

Ribbon alphabet - post #2

I decided to continue on my Ribbon Alphabet.  I have digitized all the letters, but have yet to stitch them out.

I also decided to test on the G (because it has straight & curvy lines)  to try 2 slightly different types of fill.

The one on the left is just one direction per section, the one on the right has a slight variation - trying to follow the ribbon direction.

Something weird happened near the bottom of the one on the right - I'll have to double check that one.


I'd love to hear your comments on which you prefer (minus the glitch on the bottom).

If you want to try stitching them out for yourself - I have the 2 G files for you to download.

NOTE: G - is the one on the left,   G 2 - is the one on the right.

Files in
.PES (version 2)
v10 orig.PES (version 10)
.JEF
.HUS


Monday, 16 March 2015

Kids RW Alphabet from Lagrange aux loups

Kids RW Initial Alphabet from http://lagrange-aux-loups.over-blog.com     March 2015

NOTE: This is NOT my alphabet.  I am only linking to the individual blog entries for each letter to make it easier for people to find since not everyone is an expert in navigating blog sites - especially when they are in different languages.


You can start at one letter and scroll backwards or forewards - but there are some other designs in between.

Letter A for Apple
Letter B for Balloon
Letter C for Castle
Letter D for Dominos
Letter E for Earth
Letter F for Flowers
Letter G for Grapes
Letter H for Hats
Letter I for Ice Cream
Letter J for Jack in the Box
Letter K for Kite
Letter L for Leaves
Letter M for Mushroom
Letter N for Nest
Letter O for Orange
Letter P for Pinwheel
Letter Q for Queen
Letter R for Rose
Letter S for Snowman
Letter T for Train
Letter U for Umbrella
Letter V for Violin
Letter W for Watermelon
Letter X for Xylophone
Letter Y for Yo-Yo
Letter Z for Zipper

Saturday, 14 March 2015

My next alphabet?


I've been trying to decide what type of Alphabet I should digitize next.  (I really should go back and try stitching out my Gold Panda Applique Alphabet

I stumbled on this Font and decided to see what it would look like stitched out.

I'm pretty happy with the result - It might just be my next project.  Any comments?


In the hoop projects


Lately I have been collecting lots of in the hoop projects - and lots of sites are sharing great ones for Easter.

I bought some felt and decided to bite the bullet...

Thanks to Britt Designs on their Yahoo & MeWe groups - they have been sharing these really cute In the Hoop Candy Holders.

My first attempt: the simple Egg.

It worked well - I didn't quite trim the inside properly - but it was good.  Only one small digitizing problem (look at the lower left blue block) - a newer version has been posted on MeWe to fix the problem.


Next up - the bigger chick Candy Holder.


Ooops - forgot to trim the final threads after putting on the vinyl - so they are showing through.  The problem with this one is that the vinyl started separating from the chick at the bottom of the centre.   I'm not sure if the vinyl I'm using is too flimsy - but I can change the zigzag around the vinyl to one that doesn't have as dense of stitching.


I decided that the egg as given - is a bit small and what is the point of having such a big embroidery hoop if I'm going to just stitch 4x4?  Last night I digitized my own bigger (5x7) egg.


This is the comparison in size between the eggs.


In a different note - I have also downloaded lots designs from ITH Design but hadn't actually tried any.  The hair clips and bobby pin covers looked intriguing.   They sew up quickly and have great instructions.


Happy Pi Day.

Once in a century   3.14.15 9:26:53